Thursday, September 26, 2013
Install a contact me form on Drupal
These instructions helped me out.
Enabling the Contact Module in Drupal 7:
- Log into your Drupal 7 dashboard
- Go to Modules
- Find the “Contact” module, place a check mark next to it and click "Save configuration"
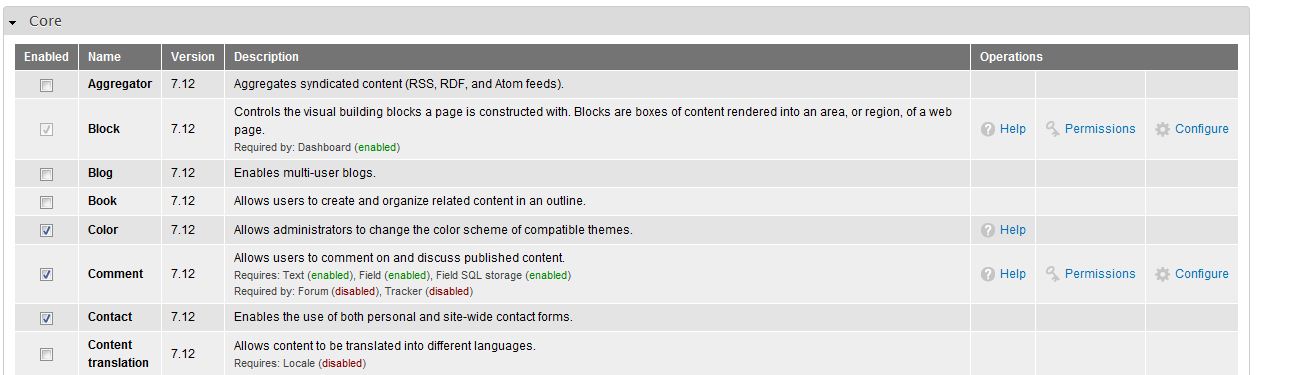
- Close the overlay by clicking the “X” in the right corner
- Now that your contact form is enabled, you’ll have to change the permissions so everyone can use it. Click “People” in the top admin menu bar
- Click the the “Permissions” Tab in the right corner

- Scroll down to the contact section and check the boxes you want to apply to the permissions. If you want everyone to be able to use your form, set Use the site-wide contact form to both ANONYMOUS USER and AUTHENTICATED USER.

- Click “Save Permissions” at the bottom of the overlay
Your default contact form is now ready to use. However, there’s no link on your website for it. For more information on configuring the contact form and adding a link in your menu to it, please see our other articles.
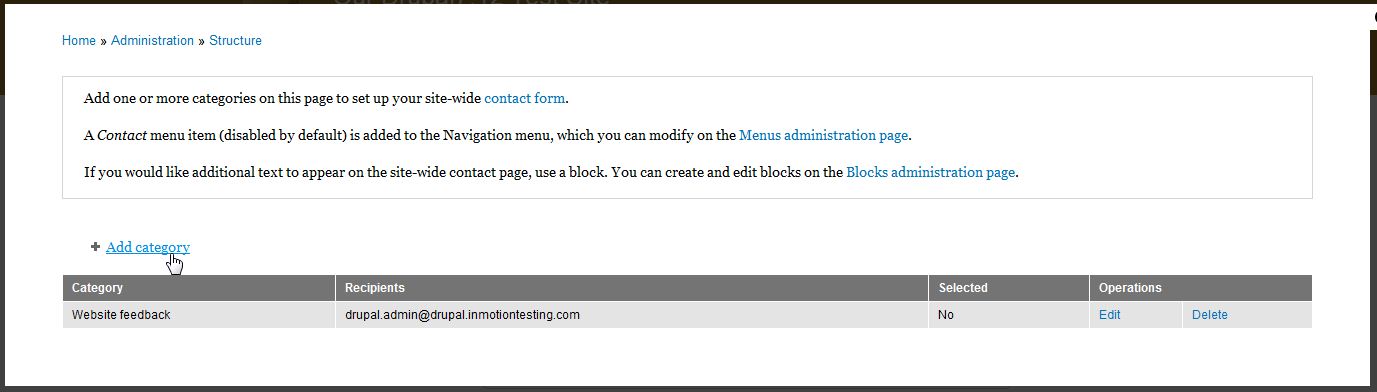
Now that you have installed the “contact” module in Drupal 7, it’s time to create and configure the contact form.
- Log into your Drupal Dashboard
- Go to Structure >> Contact form
- Click Edit next to the default Website feedback category
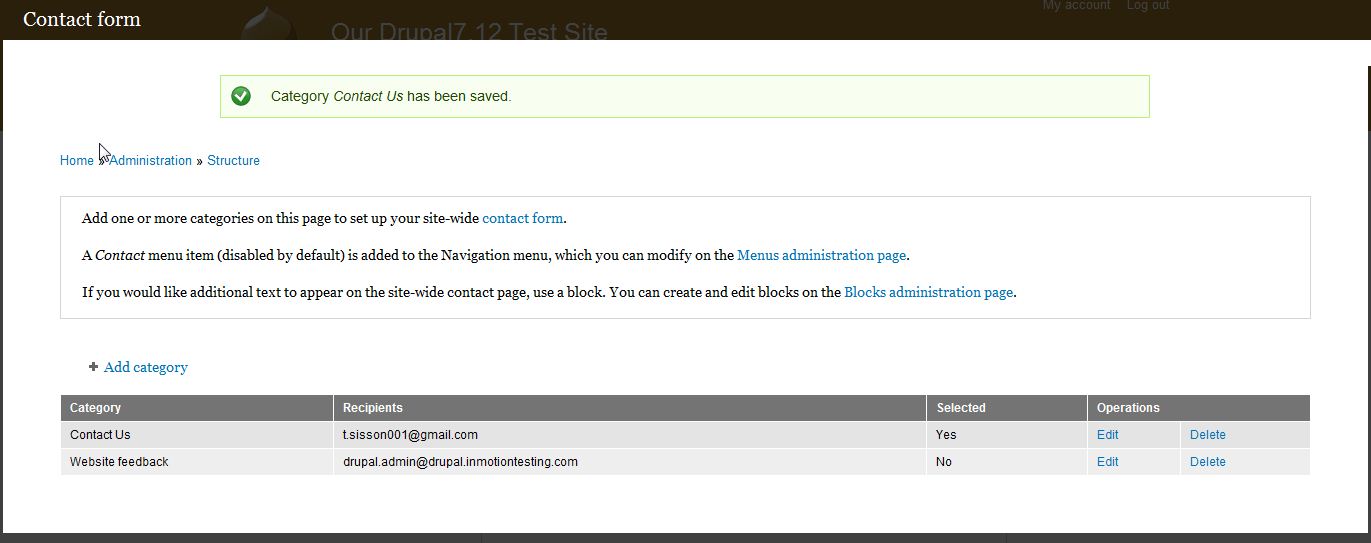
- Fill in the fields appropriately.
Category Enter a category (more like a title) for your feedback form. Recipients Enter the email addresses that you would like the results of the form emailed to. If sending to more than one email address, put each email address on its own line. Auto-reply If you would like an auto reply message sent, enter it here. For example, some users prefer to get an email similar to, "We have received your feedback and will get back to you soon." Weight On pages that list the available forms, you can change where this form is listed by adjusting the weight here. Selected If you would like this to be the default form, set Selected to yes. 
- Now you can see if the form is created. If you need to edit the form in the future, simply click “Edit” from this screen or if you want to permanently delete the form click “Delete”
The form will be available if you visit yourdomain.com/contact but will not show up on your website until you add it to the navigation. For more information on adding the contact link to your website’s navigation, please see our article.
Before being able to add the contact form into your main menu, you should have already installed the contact module and configured the settings. Now, you need to create a way for your website’s visitors to actually find and access the form. You can add a contact link to your main menu via the Drupal dashboard.
- Log into your Drupal 7 Dashboard
- Go to Structure >> Menu
- Click Edit Menu next to Main Menu
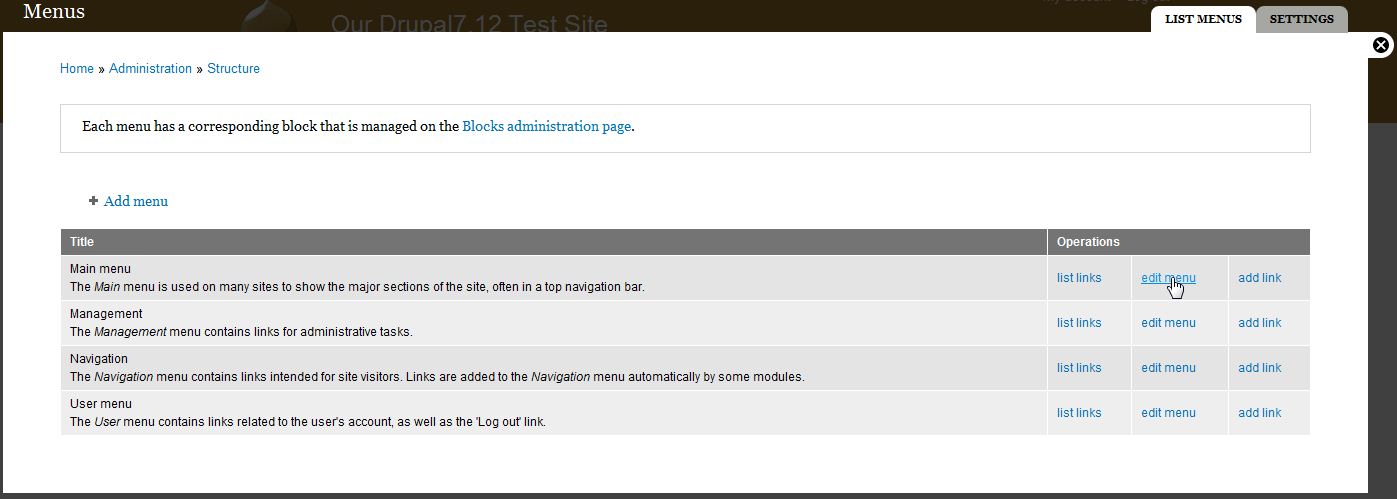
- Click on the List Links tab in the top right
- Ensure you are on the LIST LINKS tab (tabs are shown in the top right) and then click Add Link in the top left
- Fill out the desired fields with the appropriate data.
Menu link title This is going to be the actual text the users click on in the menu to get to this page. Path As the contact form by default is located at http://domain.com/contact, entercontact as the path. Description The Description field will display its contents when using the mouse to hover over the menu link. Enabled The Enabled box must be checked for the menu item to be visible. Show as expanded If this menu item has children, always show the children. Parent link Parent Link is for use if you want to place the menu under another menu item as a child. By default, this is set to <Main Menu> so it is on the top level. Weight Weight is a numerical designation for where the item will display in the menu. The lower the number, the higher or more to the left the menu item is placed. 
- Click Save
Now, when you visit your website, you’ll see that there is now a link to your contact from in the menu bar.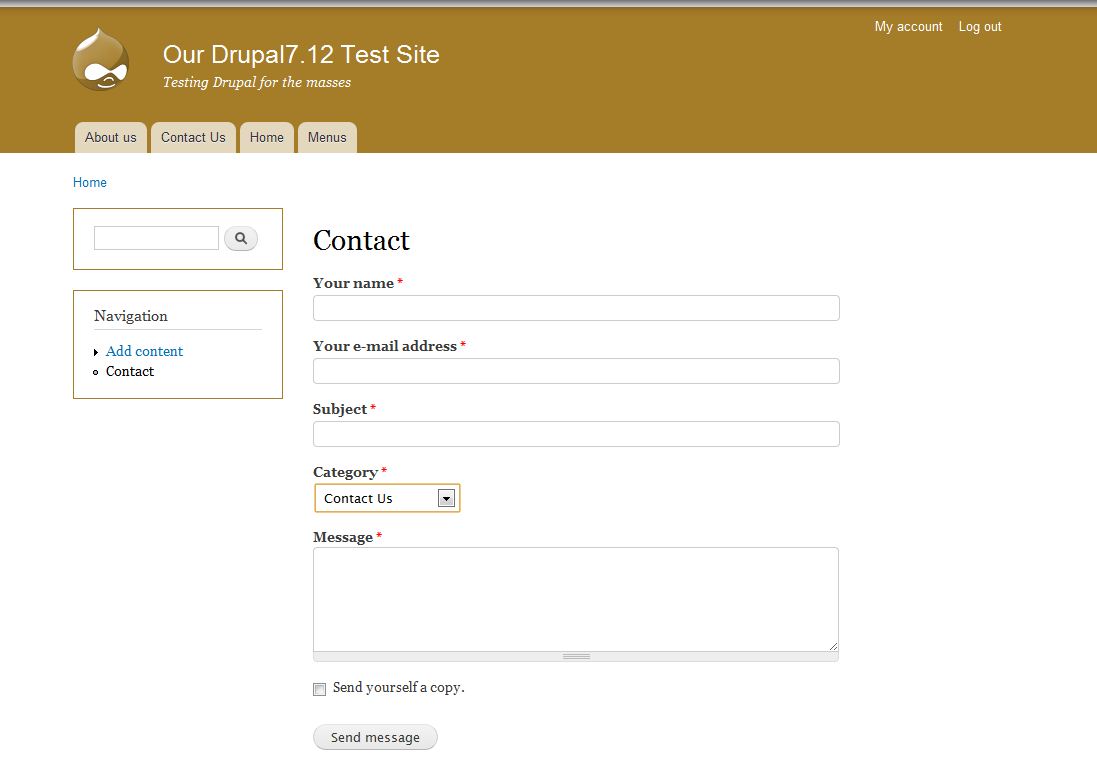
Drupal Installation
10:30 PM Sep 26, 2013 , Zigatala, Dhaka
Downloaded tasksel and downloaded lamp
But phpmyadmin is not working.
Let's see What we can do about it. Well I just went to this URL
http://localhost/phpmyadmin/
Surprise Surprise it simply works.
May be a restart was required!
Ok now I am read to go to the next step of installing drupal.
http://munix.dk/tutorials/computers/install-lamp-web-server-and-drupal-ubuntu
Now the above is a great site which documents LAMP and Drupal installation. It's very comprehensive and I actually did not follow all the steps. But I got to the stage where I can install drupal.
But I am thinking whether I should follow the steps to the core.
Actually I did every step to stay in the safe side!
11:30 PM Oooooooo uh! Done with Drupal installation, ah! great
What to do next?
Top ten things to do after Drupal installation
http://www.rundrupal.com/tutorials/top-9-things-do-after-you-install-drupal
http://www.onextrapixel.com/2011/10/06/from-design-to-live-15-must-do-steps-after-installing-drupal/
http://www.devsaran.com/free-drupal-theme
Building Vim plugin from Sources
Well, the following link gives some information on how to build gvim from sources and along with important info on how to build from sources in general:
http://aufather.wordpress.com/2010/08/15/building-gvim/
Now I seem to go back to the following link:
https://github.com/Valloric/YouCompleteMe/issues/1
I did not find any link which says how to build a plugin from sources. So what should I do? Let me go to github page of YCM (YouCompleteMe) and see whether I can get the source file.
Well It's official page has all the information of how to recompile YCM:
https://github.com/Valloric/YouCompleteMe
I was such a fool not to read it through. Here are the specific instructions from above link:
Remember: YCM is a plugin with a compiled component. If you update YCM using Vundle and the ycm_core library API has changed (happens rarely), YCM will notify you to recompile it. You should then rerun the install process.
Install development tools and CMake:
Make sure you have Python headers installed:
Compiling YCM with semantic support for C-family languages:
http://aufather.wordpress.com/2010/08/15/building-gvim/
Now I seem to go back to the following link:
https://github.com/Valloric/YouCompleteMe/issues/1
I did not find any link which says how to build a plugin from sources. So what should I do? Let me go to github page of YCM (YouCompleteMe) and see whether I can get the source file.
Well It's official page has all the information of how to recompile YCM:
https://github.com/Valloric/YouCompleteMe
I was such a fool not to read it through. Here are the specific instructions from above link:
Remember: YCM is a plugin with a compiled component. If you update YCM using Vundle and the ycm_core library API has changed (happens rarely), YCM will notify you to recompile it. You should then rerun the install process.
Install development tools and CMake:
sudo apt-get install build-essential cmakeMake sure you have Python headers installed:
sudo apt-get install python-dev.Compiling YCM with semantic support for C-family languages:
cd ~/.vim/bundle/YouCompleteMe
./install.sh --clang-completer cd ~/.vim/bundle/YouCompleteMe
./install.sh
Building Vim from sources
It was required to build Vim from sources since plugin like YouCompleteMe requires newer version.
Download the source files from the following link:
ftp://ftp.vim.org/pub/vim/unix/vim-7.4.tar.bz2
This is given in official download page of Vim:
http://www.vim.org/download.php#unix
hg clone method produced error. So I went to uncompressed folder of the above tar file and followed the following procedure:
The above instruction has been taken from the following site:
https://github.com/Valloric/YouCompleteMe/wiki/Building-Vim-from-source
But then it produces an error that whenever GVIM runs it says YCM needs to be built from the source.
Here someone is trying to do that but encountering problems:
https://github.com/Valloric/YouCompleteMe/issues/1
So search google for ways to build a plugin from source.
Download the source files from the following link:
ftp://ftp.vim.org/pub/vim/unix/vim-7.4.tar.bz2
This is given in official download page of Vim:
http://www.vim.org/download.php#unix
hg clone method produced error. So I went to uncompressed folder of the above tar file and followed the following procedure:
cd vim
./configure --with-features=huge \
            --enable-rubyinterp \
            --enable-pythoninterp \
            --with-python-config-dir=/usr/lib/python2.7-config \
            --enable-perlinterp \
            --enable-gui=gtk2 --enable-cscope --prefix=/usr
make VIMRUNTIMEDIR=/usr/share/vim/vim74
sudo make install
The above instruction has been taken from the following site:
https://github.com/Valloric/YouCompleteMe/wiki/Building-Vim-from-source
But then it produces an error that whenever GVIM runs it says YCM needs to be built from the source.
Here someone is trying to do that but encountering problems:
https://github.com/Valloric/YouCompleteMe/issues/1
So search google for ways to build a plugin from source.
Wednesday, September 25, 2013
Summarizing my experience with Linux
I had some torrid time with Linux installation. Ubunut 13.04 and it's derived distros like LUBUNTU, XUBUNTU all had "buffer overflow" error in R while installing new packages. After much trial and tribulations I settled down with Ubuntu 12.04 LTS. After a week, I am quite happy with it. R works just fine but it had the problem of resuming from suspension. The same problem I had in MINT 15. Following patch from here worked out just great. I am ever grateful for that. Otherwise I would have been still in limbo.
Fix Suspend
From “unziberla” in the comments below:
Guys, i fixed suspend on my AO751h with 12.04 starting from old patch for 11.10 from which i removed one quirk.
Open a terminal and use the following commands:
gksu gedit /etc/pm/config.d/gma500
Add in one of the following codes and save the file (apparently one “-” works for some and others need two “--” in front of “quirk-vbemode-restore”):
ADD_PARAMETERS='-quirk-vbemode-restore'
ADD_PARAMETERS='--quirk-vbemode-restore'
This has been a life changer. No doubt about that.
Subscribe to:
Posts (Atom)